Showing posts with label tutorials. Show all posts

Thursday, 28 April 2016

Tutorial using the NEW Quick Page Templates

I have been asked how my new templates work, so i thought i would do a picture 
tutorial i hope it helps, and shows you how easy they are to use for a quick layout your way :)

I use Paint Shop Pro X8 but as long as you have a program using layers you are good to go.

Step 1 - Open your Template


Step 2 - Choose the Papers you wish to use.


Step 3. Open your first paper in your program.
Copy your paper ( Edit - Copy)
Paste as a new layer on top of the template
Make sure it is UNDER the template
(select and drag down) 


Step 4 - Repeat Step 3 with the second paper, dragging it to the MIDDLE layer


Step 5 - Select (Highlight) your TEMPLATE layer and grab your MAGIC WAND
click the area you wish to delete - you will get marching ants.

Now Select the paper you wish to alter in our case the MIDDLE LAYER and hit DELETE


Step 6 - You now have your two papers in place :)

Next we add our photo, UNDER the template layer but on top of the papers.

For my Photo the template is the wrong way so we will rotate it.

IMAGE - FREE ROTATE - RIGHT - 90 - OK


Step 7 - OK now i am going to size my photo to fit behind the squares.

Or you can fill each square with a different image, or use the large space
for the photo and the small squares for papers or elements.

OK Now select your MAGIC WAND and the TEMPLATE LAYER
select the large area at the side of the squares, switch to your MIDDLE PAPER 
and HIT DELETE.


Step 8 - I am now adding a drop shadow to add some definition

Select the TEMPLATE LAYER and your DROP SHADOW ( White Arrow on Image)
and add a drop shadow of your choosing and press OK 


And thats it, all you have left to do now is personalize it with Elements or Journalling.


-oOo-

Dragons Lair Designs supply an eclectic assortment of digital downloads.  
Buy, download, then either work with the items digitally, start digitally then print out and complete your crafting as a hybrid project, or print straight out and do your usual paper crafting.

Buy your Dragons Lair Designs digital downloads here -

-oOo- 

 Other Dragons Lair Designs sites you might like to

Thursday, 6 February 2014

Crafting on a budget - desk tidy

Hi everyone I hope that you are all well and happy.
Its that time againlol the time where I show you something that I have made on a budget and this fortnight I have a desk tidy to show you!
A few things that can be used

 Trying it out as a hat
So I rough cut down the lengths of a sweetie tube and after a kik conversation with Marleen ( she dared me ) decided to try it out as a hat .

 Part done
I used a layer of mustard yellow distress paint , followed by a layer of gesso , followed by a layer of picket fence distress paint followed by a layer of modge podge to seal it. Any paint can be used but distress was on my desk so I used that. On the inside I have put shimmer card although on this pic you can not see it and around the inside top ive used some pink crossgrain ribbon and some stretchy organza ribbon around the top on the outside.

 The finished product
To finish I have simply layered a paper flower from my stash and popped a button in the centre and popped some bits inside. It now has its place on my desk along with tidies made from cola can, pet food can and a cut down washing powder box.
This has cost literally pennies to create and looks lovely on my desk.

Thank you for taking the time to join me and I hope that you like what I have shown you today.
Please pop along to the FB group where you will find lots going on on a daily basis including the loyalty points scheme and daily inspiration.
Thanks for stopping by
Hugs Tina
HAPPY CRAFTING
xxx


Thursday, 23 January 2014

Crafting on a budget

Hi everyone how are you all?
Today I would like to share with you a stencil/mask that I have made from a plastic milk bottle, it is the first time that I done anything like it and I am going to be making more of these as they are quite easy to do but I still need some practice ha ha.
 A couple of things I used.
I used a craft knife and scissors to cut the bottle into pieces, the bottom of the milk bottle is going to be used for a future project.
I rough wrote on the plastic and then using the craft knife cut out the letters.
I also punched 3 heart shapes on a separate piece of plastic(see pic below)

I used a washing up sponge to apply Fired Brick distress ink to a 5x5 card blank and using the stencil/masks I used the sponge and fired brick to put a heart in the corners and "LOVE" at the bottom of the card. 

And here is the card !
As you can see a certain dragon has made an appearance! I do love this digi I have coloured her with promarkers but she also comes ready coloured! pop along to the store where you will find her and so much more !
Penny Dragon in Heart
So as you can see this card has cost pennies to make and the stencil/mask was FREE! budget crafting at its best.
Thanks for stopping by
HAPPY CRAFTING
xxx


Sunday, 8 May 2011

Tutorial Sunday - May 8th 2011

Here is todays Tutorial Sunday Challenge with thanks to Splitcoast Stampers :)

I do hope you have a go and enjoy this one :)

Sunday, 24 April 2011

Tutorial Sunday - April 24th 2011

Here we have somthing a little different for todays Tutorial Sunday Challenge with thanks to Splitcoast Stampers :)

You can also see a written tutorials with sizes and pictures HERE

Ok lets make this a little more interesting, what i want you to do is link your card here, and next sunday i will do a Random Draw so that one lucky cardmaker wins ONE Stamp from me.

I do hope you have a go and enjoy this one :)


Sunday, 17 April 2011

Tutorial Sunday - April 17th2011


Here we have anoher cool looking card for todays Tutorial Sunday Challenge with thanks to Dreaming About Rubber Stamps :)

Ok lets make this a little more interesting, what i want you to do is link your card here, and next sunday i will do a Random Draw so that one lucky cardmaker wins ONE Stamp from me.

I do hope you have a go and enjoy this one :)

Sunday, 10 April 2011

Tutorial Sunday - April 10th2011

Oooo i loveth elook of this one, so here is todays Tutorial Sunday Challenge with thanks to Splitcoast Stampers :)

I do hope you have a go and enjoy this one :)

Sunday, 3 April 2011

Tutorial Sunday - April 3rd 2011

I found this Easle card tut on Top Tip Tuesday and seeing as i ALWAYS seem to strugle with them i thought it was such a cool and easier way to try now i HOPE to have a go today and if i do i will add my piccy here then, but again as always PLEASE feel free to try and then link here i would love to see how you all get on with it :)

EASEL CARD TUT from Top Tip Tuesday


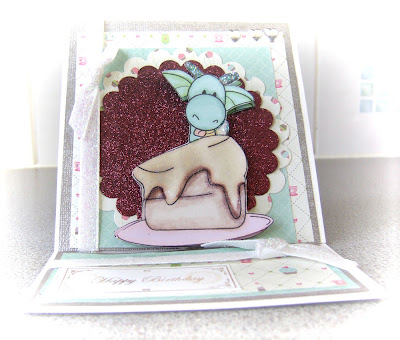
 Heres mine and i really have to say that was EASY brilliant way to make an Easel Card :)

Sunday, 27 March 2011

Tutorial Sunday - March 27th 2011

Here we are again with another cool Tutorial i found over on YouTube, this one is from Splitcoat Stampers and looks really cool, now i havnt had time to play with last weeks yet so i now have a growing list lol.

I hope you enjoy this one and please link your card here if you play along so i can come and have a peek :)

Sunday, 20 March 2011

Tutorial Sunday

I thought it may be fun to share a tutorial once a week, maybe we can all play along and learn somthing new at the same time :)

I have seen these cards on my travels and think they look pretty cool so i think this is a must try for this week I hope you enjoy :)

Sunday, 13 March 2011

Lace Flowers

I know this is for dressmaking but what a cool simple idea for flowers i just had to share :)

LinkWithin

Related Posts with Thumbnails