Showing posts with label Oh Baby Mine. Show all posts

Monday, 5 September 2016


Hi everybody.

For September, here on the Dragons Lair Designs Inspiration Blog, we are working on the theme "Preparing For Christmas" and hope that we can inspire you with different ideas for crafting for Christmas, but not only for Christmas but for other times of year as well.

I've got a few ideas for you to think about and hope you like what I've made.

They don't look very "Christmasy", but not all Christmas gifts and ideas have to look specifically "Christmasy", especially if they are made to be used all year round, and you can always add more traditional Christmas items to any creation you make.

What I Made:
  • A decorated gift bag to give a baby blanket I'd crocheted in
  • A decorated "Book Box" of hand made cards
  • An unique mouse mat.
.

These are what I used:

Stamping Dragon Designs Item:
Items from the "Summer Sunset" collection available - here - in the store.
Items from the "Oh Baby Mine" collection
Background from another collection
Consumables:
Equipment:
  • Scissors
  • My Craft Studio Elite Software
  • Baby Blue Die Cutting Machine
  • Tonic Butterfly Die
  • Tattered Lace Flower Die
  • Non-stick Craft Sheet
  • Paint Brush
  • Pallette
  • Sponge
  • Pokey Tool
Method - Mouse Mat:

This is a great way to make something that will be used a lot, and looked at often, but will be a specific memory for the recipient.

It's basically a scrapbook layout, created digitally, and printed out at the correct size to fit inside a blank mouse mat.  (it needs to be constructed digitally at the correct size for your blank because you must have a perfectly flat image for inside the mouse mat).

As this mouse mat was a gift for my father, who's had his autobiography published this summer, I wanted to keep the image layout very simple - lots of flourishes and frames wouldn't have been suitable for him, but for a different person a different look can easily be achieved in whatever graphics package you choose to work in.

I chose a pale blue background from one of the DLD collections as a background (should have made a note of which one I used I know!).

I then took the image from the front of his book, together with three photos my youngest sister had taken of him at three different book signing sessions during the summer, framed the photos, and made a simple layout.


This was then printed and cut out to size and put into the blank mouse mat before using the tape that was inside one edge to seal it.  I then used ultra tacky tape to attach the gell wrist rest.


Method - Book Shaped Box Of Assorted Cards

If you are a person who makes more cards than you have people to give them to, and are not able to get out and about to go and sell them at craft fairs, etc., then how about boxing some of your makes up to give as gifts to family and friends?  It will be a Christmas gift that will be useful to the recipient for months to come.  You can go all ornate in how you box them up, or keep it simple - how you present your gift is up to you.  I've used a book shaped box file and decorated it simply so that it can sit unobtrusivaly on a shelf until needed.  I'm actually giving this one as a raffle prize in a charity event my niece is organising this month.

I took the same type of book shaped box file as I used in a previous project - here - and painted it with white gesso.  I then painted it using Cosmic Shimmer Paints as I did on another project - here.  I was going for quite a distressed, old book, look.

I took items from the Summer Sunset collection into My Craft Studio software and put together a "book name" panel.  I printed this out quite small for the spine of my book box and larger for the front.  After cutting these out I attached them to book box.


I then went through my collection of made up cards to select an assortment, put in inserts, attached a sticker with my details to the back of each, matched them up with an envelope and put them into the decorated box.

 (You may recognise the dragon on the front of the top card!)


Method - Decorated Gift Bag:

Gift bags are handy to put gifts that are hard to pack into.  But buying decorated ones are expensive, so why not invest in a pack of plain bags and decorate them yourself.

With so many different collections available in the Dragons Lair Designs online store you are sure to find digital downloads that you can work with and print off to decorate a gift bag for anybody for any occasion.

I've used a baby collection to decorate this gift bag to place a baby blanket I crocheted into.

Once again, I took items from the collection into My Craft Studio to resize, add text, etc., and then printed them out onto Super Smooth cardstock.

I did one panel, including a digitaly "die-cut" Christmas Tree, for the front of the bag.


A panel and a frame for the back.  As this is another item that will be given as a raffle prize for the charity event I'm going to slip in a picture of the blanket that will be inside it and slip it into the frame.  The frame in this instance is stuck on on three sides using double sided tape.


I also made a gift tag with a panel for somebody to write a greeting on the front.


 And a pocket with a window that has acetate inside it on the back - I do this for anything I make using yarn these days so that the recipient knows the yarn content and how to wash the item that's being gifted.


- o O o -
Anybody noticed that the first two items would be suitable for entries into this month's Dragons Lair Designs Challenge Blog?!  The theme for September is Books and/or Paper.  As the first item is a mouse mat based on the launch of a book and features book signing sessions it would fit into the theme.  As would the gift box of assorted cards that's in the shape of an old book.
So I hope that, not only have I inspired you to think of different things to craft for Christmas, but also to craft something suitable for entry into the challenge.

- o O o -
And that is it from me for today.
Please keep coming back regularly to look at new posts as, over the next few weeks, you'll find various "Inspiration by ..." posts appear on this "Dragons Lair Designs Inspiration Blog", as well as other posts by different Design Team members.  I'll be back with more posts over the coming months as well, so keep an eye out for those.

Till next time - Have Fun Crafting!
Dragons Lair Designs Inspiration Blog Design Team Leader
(And if you are wondering "who's Gwyneth?" - then you'll find an "About Me and My Blog!" piece on my blog.)

------------------------------------------------------------

Stamping Dragon Designs Links
  • If you fancy trying out some of Dragons Lair Designs, please do visit the Store to find all sorts of digital goodies (you'll find great digi-stamps and lots more).
  • We are also on Etsy, so you can pop along - here - to find some Dragons Lair Designs digital downloads.
  • And why not join the "Dragons Lair Designs Fan Group" Facebook group. It's a small, fun, group where we have lots of different activities which include exclusive challenges, daily inspiration and giveaways - and there's a loyalty club for those who take part as well.
  • "Like" Us on Facebook
  • Dragons Lair Designs Challenge Blog : new challenge 1st Friday every month
  • Follow designer Janette Padley on Pinterest!
  • See us on CraftsUPrint
  • And on Etsy

Sunday, 29 March 2015

A Baby Girl Card Created By Lynne From The "Oh Baby Mine Collection"

                          baby girl card

                                        Hello.
First time I have blogged for
                                        Dragons Laur Designs. It is very exciting doing all the different projects
                                        using the wonderful DLD papers and images
                                         My card for 'Oh Baby Mine' to show off is


-oOo-
You can find all components of the "Oh Baby Mine Collection" in the Dragons Lair Designs Store - Here!  Don't forget that there's a big discount on this collection until the end of the month.
-oOo-

Dragons Lair Designs Links:

Saturday, 28 March 2015

Digital Paper Piecing

Hi,

This month I am doing something completely different for you. I will be using the Stork Digi Stamp from the Oh Baby Mine Collection and trying my hand at some digital paper piecing using the Cameo Silhouette software.


1. First I transfered the digi stamp to my Silhouette software

2. Then I used the trace feature to trace the whole thing.

3. I moved the original image to one side...

...and then released the 'compound path'

4. This has now separated the image into sections.

5. I uploaded the collection papers into the 'pattern' section of the software...
 ...which I then used to fill each of the sections.
 (I filled the outline of the eye in black)


 (Fill the facial features with black)

 6. Once I had filled all the sections I grouped them together...

 ...and placed them over the original image to give the black outline, and grouped the whole thing together to form one complete image.

And here is the finished image with the added background and drop shadow.

See you next month


Saturday, 21 March 2015

Joanna's Inspiration - Easter decoration

Hi! This is my first post for Dragons Lair Designs. I want to show you an easy Easter decoration - an egg on a stick, which can be put in a flowerpot. I chose two matching papers from the Oh Baby Mine collection, cut two eggs, one about two centimeters bigger than the other and distressed the edges. Then I made some splashes with an olive mist, you can use watercolors as well. In the end I glued a few butterflies, each size cut twice and glued one on the top of the other to add some dimention. 

Cześć! To mój pierwszy post dla Dragons Lair Designs. Dzisiaj zaprezentuję prostą dekorację wielkanocną - mediowe jajko na piku, które wspaniale prezentuje się wetknięte w niezbyt wzorzystą doniczkę. Wybrałam dwa pasujące do siebie arkusze papieru z nowej kolekcji Oh Baby Mine, wycięłam dwa jajeczka, jedno około centymetra większe od drugiego, na koniec potuszowałam krawędzie. Całość spryskałam oliwkową mgiełką, możecie użyć również wody zabarwionej akwarelą. Następnie podkleiłam warstwowo motylki, dzięki czemu uzyskałam efekt głębi.


Visit the shop to see the new Oh Baby Mine collection, which is perfect to make baby cards and embellishements, as well as for creating great Easter decorations.

Zapraszam do odwiedzenia sklepiku i obejrzenia naszej nowej kolekcji papierów i dodatków Oh Baby Mine, która idealnie nadaje siÄ™ do tworzenia "dzidziusiowych" prac, jak również do wykonania niepowtarzalnych Å›wiÄ…tecznych dekoracji. 


Dragons Lair Design links:


Monday, 2 March 2015

Inspiration by Gwyneth - March - Oh Baby Mine Gift Bag

Good Morning Everybody!

Hi everybody.

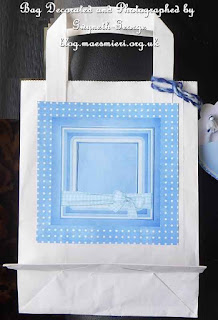
I'm in the process of putting together some items to donate to a charity rafle and auction that my brother-in-law is organising, and one of the items I've made is a scarf.  I decided that it would look better if I packaged it in some way, and decided that a strong gift bag would be best.  I also decided that I needed to include information on the washing instructions for the scarf - so my solution was to make a matching tag with a pocket on the back to include a ball band from the yarn.

I used  "Oh Baby Mine" kit that was launched on the 1st in the Dragons Lair Designs store.  Although lovely for baby cards and scrapbook pages I wanted to inspire you to use the kit for other projects as well.

This is a photo of the front of the finished bag -

.
Stamping Dragon Designs Item:
Items from the "Oh Baby Mine Collection" available - here - in the store.

Consumables:
250gsm Super Smooth cardstock, Centura Pearl Cardstock, Quick Grab Web Glue, Eyelets, Left Over Yarn From My Crocheting Project
Equipment:
Hougie Board, Scissors, Crop-a-dial, My Craft Studio Software, Black Fine Gel Pen

This is what I did:
I took elements from the kit into the My Craft Studio software and resized to what I required, copying some several times and layering some up, such as the topper for the bag front, giving the "folded" paper a drop shaddow look before putting on the lighter background for the topper.  Everything was then printed out and cut out.

I took large sheets of Centura Pearl Cardstock (I think they were 16" square) and scored and folded ready to make my bag.  I then decorated the bag front panel and the back panel, with my chosen backgrounds from the collection and the toppers I'd put together from other collection elements, before gluing it together so that I was working on a firm surface rather than trying to stick onto a dimensional bag.

For the back panel I've cut along the top of the ribbon and bow element before sticking it on and decorating with the butterfly.  This slit is to allow me to put in a picture of the scarf with my contact details on it.


I used my Crop-a-dial to punch holes in the bag top as well as the top of the tag I'd designed, also using the tool to add white eyelets to the items..  I used the yarn I'd used to crochet the scarf to tie the top of the bag together as well as to attach the tag.
You will notice that part of the decoration I've added to both the front and back of the bag, as well as the tag, are several runs of "faux stitiching" using a black pen.
I've left plenty of space on the back of the tag for whoever gets the scarf to write a greeting if they wish to give it as a gift to somebody else.  I used another piece of the backing paper to make a pocket on the back of the tag to slip in one of the ball bands from the yarn with a little of the yarn attached.  That way the final recipient will know the wool content of the chunky yarn used as well as the washing instructions.


-oOo-
And that is it from me for today.
Please keep coming back regularly to look at new posts as over the next few weeks you'll find various "Inspiration by ..." posts appear on this "Dragons Lair Designs Inspiraiton Blog", as well as colouring tutorials and other posts by different Design Team members.  I'll be back with more posts over the coming months as well, so keep an eye out for those.

Stamping Dragon Designs Links
  • If you fancy trying out some of Dragons Lair Designs, please do visit the Store to find all sorts of digital goodies (you'll find great digi-stamps and lots more).
  • And why not join the "Dragons Lair Designs Fan Group" Facebook group. It's a small, fun, group where we have lots of different activities which include exclusive challenges, daily inspiration and giveaways - and there's a loyalty club for those who take part as well.
  • "Like" Us on Facebook
  • Dragons Lair Designs Challenge Blog : new challenge 1st Friday every month
  • Follow designer Janette Padley on Pinterest!
  • See us on CraftsUPrint

Till next time - Have Fun Crafting!
Dragons Lair Designs Inspiration Blog Design Team Leader
(And if you are wondering "who's Gwyneth?" - then you'll find an "About Me and My Blog!" piece on my blog.)

Sunday, 1 March 2015

Oh Baby Mine - New Collection Launch At Dragons Lair Designs

You've probably already seen some of the "Sneaky Peaks" of creations made using elements from the new collection put online by Dragons Lair Design's Design Team members over the last few weeks - Well - the launch day is here!-
And everybody can now get their hands on the new -
"Oh Baby Mine" Collection
- in the DLD store!

Full of lovely elements and papers that you can either craft with digitally or print out for a variety of papercrafting, you can find the various components of the collection - Here! - in the Dragons Lair Designs store.
From the palest creamy yellow, pinks and blues and greens, with and without patterns, there's a lot of backgrounds and other elements available.


And even more good news - there's a discount available to save on the cost of any of the items in the collection for a whole month!  Go on, have a look in the store to see how much of a discount is being given!

If you've missed seeing any of the "Sneaky Peaks" around the online crafting world over the last few weeks then have a look at them now - I'm sure that they will inspire you to get crafting with the new kit.

Gwyneth
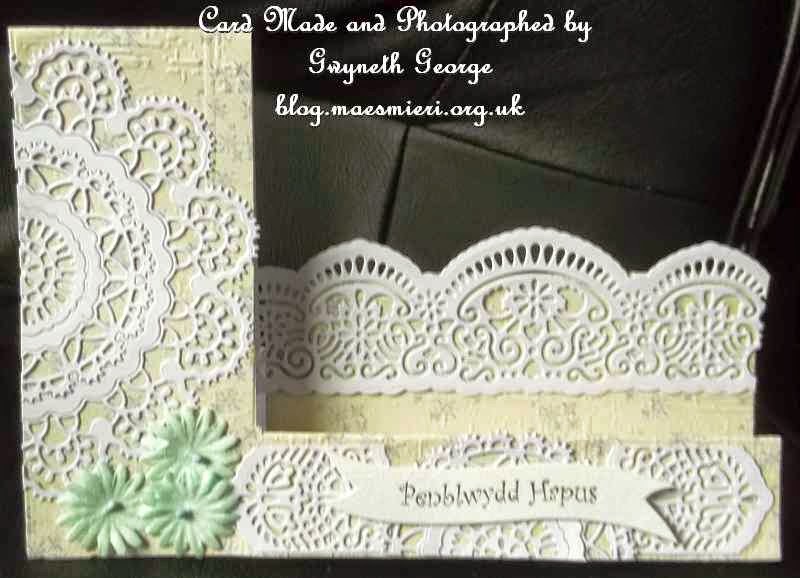
Choosing one of the lightest backgrounds as a base card to set off white lacy die-cuts.


Again choosing a couple of the softer backgrounds for a base card and mats behind a Dragons Lair Designs digi-stamp topper.


A huge assortment of wonderful creations made using a variety of different items from the collection.


Sarah
(Design Team Leader for our sister site, the Dragons Lair Designs Challenge Blog)
An octagonal box
 Same box with the lid off

Susan
A collection of blue themed ATCs

Diane
A lovely baby card.


So it's not all baby blue and baby pink, although you will find plenty of blue and pink in the collection if you are looking for them for your projects, but from the softest patterns to stronger coloured polka dot backgrounds, there are items in this "Oh Baby Mine" collection that will work for many types of projects.

I think that the large number of items made by the Design Team members shows how much we've loved working with this collection, so don't miss out on getting it at the launch discounted price and go to the store now to make your choices and get what you'd like.

Dragons Lair Designs Links:

We'd love to have you join us in our Fan Group and post up some pictures of any creations you make using this collection, or any other DLD items.


LinkWithin

Related Posts with Thumbnails