
Basic Scrapbook Layout
By
Dragons Lair Designs April 29th 2013 – Any Similarity to any other
Tutorial is coincidental, DO NOT DISTRIBUTE WITHOUT MY EXPRESS PERMISSION
If you would like to use any tutorial please ask me first.
Tutorial is coincidental, DO NOT DISTRIBUTE WITHOUT MY EXPRESS PERMISSION
If you would like to use any tutorial please ask me first.
Starting
out in scrapbooking can be daunting, you see all the awesome Layouts (LO's)
created by seasoned scrappers and think Ohhhh Myyy I am really not good enough
to do this I can't share anything it's not good enough !!!!!!!
Sound familiar ? Well have a go at this basic layout all you need is some papers and elements there are free items all around the www (and in store if you look around) and a photograph
Instructions are for Paint Shop Pro but this should work with most programs you will just
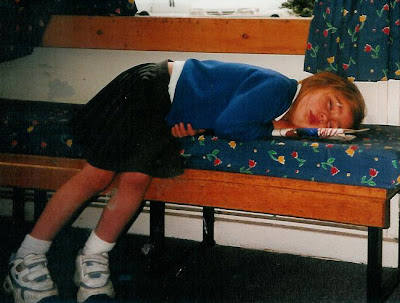
need to adjust to your programs settings This is the picture i am using
created by seasoned scrappers and think Ohhhh Myyy I am really not good enough
to do this I can't share anything it's not good enough !!!!!!!
Sound familiar ? Well have a go at this basic layout all you need is some papers and elements there are free items all around the www (and in store if you look around) and a photograph
Instructions are for Paint Shop Pro but this should work with most programs you will just
need to adjust to your programs settings This is the picture i am using
The kit i am using is a Free Kit called Gabrielle by
AnaFlor
Designs
This LO will be 8 x 8 but you can work at any size you wish just re size your paper
and then sharpen it to restore crispness
The most popular page sizes are 12 x 12, 8 x 8 and 8.5 x 11 you may want to
browse some albums and decide what size you want to work at first.
PLEASE NOTE YOU NEED TO WORK ON LAYERS, EVERY ITEM YOU PLACE
ENSURE IT IS ON A NEW LAYER SO YOU CAN ADJUST IT AS YOU GO
This is the layer pallet every time you add something to your layout a new layer will
appear this enables you to moves the items around as you go so make sure you always
Paste as NEW LAYER when adding to the layout.
This LO will be 8 x 8 but you can work at any size you wish just re size your paper
and then sharpen it to restore crispness
The most popular page sizes are 12 x 12, 8 x 8 and 8.5 x 11 you may want to
browse some albums and decide what size you want to work at first.
PLEASE NOTE YOU NEED TO WORK ON LAYERS, EVERY ITEM YOU PLACE
ENSURE IT IS ON A NEW LAYER SO YOU CAN ADJUST IT AS YOU GO
This is the layer pallet every time you add something to your layout a new layer will
appear this enables you to moves the items around as you go so make sure you always
Paste as NEW LAYER when adding to the layout.

Open
your paper and re size if needed - In this case we will re size to 8 x 8
O 
Now we will duplicate the paper (Shift & D) to work with the original is
then
safe and ready to use again at a later date, now go to Layers and
Promote Background Layer we are now ready to start putting this together.
Ready ok lets play :)
Start by right clicking on the bar above your photo and copy
safe and ready to use again at a later date, now go to Layers and
Promote Background Layer we are now ready to start putting this together.
Ready ok lets play :)
Start by right clicking on the bar above your photo and copy

Now go to your layout, again right click on the bar above your paper
and choose Paste - Paste as New Layer you now have your photo
ready to move into place, choosing the tool, move your photo
into the desired position.
looking at your layer pallet now click on the background layer, now
with the background selected right click and choose New Raster Layer then OK
Now choose another paper and open it in PSP making sure your new blank
layer is selected in the layer pallet create a shape with the selection tool
In the Selection Type choose the shape you want I am using Rectange.
and choose Paste - Paste as New Layer you now have your photo
ready to move into place, choosing the
tool, move your photointo the desired position.
looking at your layer pallet now click on the background layer, now
with the background selected right click and choose New Raster Layer then OK
Now choose another paper and open it in PSP making sure your new blank
layer is selected in the layer pallet create a shape with the selection tool
In the Selection Type choose the shape you want I am using Rectange.

We now want to flood this shape so choosing the Materials Pallet
click on the box ( in this example the one with the swirly pink pattern)
and find your paper then click OK
click on the box ( in this example the one with the swirly pink pattern)
and find your paper then click OK

Now click the paint can
 left click the mouse into your selection
to flood fill the area, your layout should now look like this, Selections
Select None to deselect.
Add a Drop shadow to add realism ( The Arrow shows you the button to
press to access the Drop Shadow Option)

At this point i am going to repeat this step to add more papers
just keep going until you are happy with how it looks, then we will
move on to the elements
Ok Ready this is mine so far

Now lets get some elements on there have a look at what you have
and decide what you would like to add.
now a couple of things before you start layering them on
if somthing is too big or a little too small you can resize it easily
Choose the PICK TOOL to resize - When finished just change to the Move Tool

Also if you find something you wish to alter in this case I want to
reduce my Photo you can do this in place easily
Select the area you want to KEEP make sure the layer you want to
change is highlighted in your layer pallet then use Shift & Control & I
to Invert the selection and hit delete - Selections Select None to deselect
DON'T FORGET YOUR DROP SHADOWS AS YOU GO
Everybody Scraps differently some like lots of elements and papers
Some like the simpler look, so let the layout talk to you, YOU will know
when it's finished as it will feel right.
Don't forget to check out the Shortcuts Page for a list of Keyboard Shortcuts
to make working easier.
reduce my Photo you can do this in place easily
Select the area you want to KEEP make sure the layer you want to
change is highlighted in your layer pallet then use Shift & Control & I
to Invert the selection and hit delete - Selections Select None to deselect
DON'T FORGET YOUR DROP SHADOWS AS YOU GO
Everybody Scraps differently some like lots of elements and papers
Some like the simpler look, so let the layout talk to you, YOU will know
when it's finished as it will feel right.
Don't forget to check out the Shortcuts Page for a list of Keyboard Shortcuts
to make working easier.

I hope you enjoyed this tutorial if you need any help or have any questions
please feel free to
contact
me and I will help you as much as I can.


