Saturday 28 June 2014

Colour along - Lily

Hiya, Debbi here again with this months colour along. Hope you can join in and post them on the Stamping Dragon Designs Facebook page.

Today we will be colouring a beautiful Lily from the Stamping Dragon Designs store.

I have mostly used Flexmarkers for this project. I started by using Pink Lavender (it's hard to see on the photograph) on the petal. Don't go right to the edge as the kind of Lily I am doing has white edges.


I then added some Pink Pearl, but didn't go out as far as the first colour.


Taking the Sorbet I added a stripe in the centre


I blended everything together using the Pink Lavender


I then added  some spots at the base of the petal using the Wild Orchids marker


Carry on the same process with each of the Petals in turn.


I then used a Oatmeal Promarker to colour the stemen...


And then added some Ginger Promarker


I followed the same process for the budding flowers  excluding the spots.


I started colouring the stem and leaves by first using a Honeydew Flexmarker


I the added the some Aniseed to the shadow areas


Using Chartreuse I darkened the shadowed areas a little more


I blended it all using the Honeydew marker


The same process was used for the two bad, but this time I used the Aniseed to blend


Lastly I took my trusty Ice grey 1 and added to the the shadowed areas an also outlined the whole flower image


And here's the finished image


Thank you for stopping by and I can't wait to see yours over at the Stamping Dragon Designs Facebook page. See you over there

Thursday 26 June 2014

Have a Homemade Christmas


Lets get started early with all the handmade goodies for Christmas, we have a large selection of page kits, paper packs and digital stamps in store all waiting for you to turn them into glorious creations :D.

Our DT Member Jacqui Robinson has created two gorgeous samples to show you.


Pop on over now and have a peek :D

DIGITAL CHRISTMAS DESIGNS HERE

Tuesday 24 June 2014

Marleen DT.

Morning blogger friends..

Today is the last day of school for my childeren.. I cant believe another school year is already over..
Soon it will be a new school year starting, then into halloween and then.. do I dare say it lol... Christmas..

But I guess today, for the last time in 2 months will I do my school run to get my children..
It does however mean (and im by no means complaining lol) that I will get more crafting time..

My kids are all really crafty. They all love sitting down with me and make cards or paint and living in Ireland, we have plenty of rainy days where the outside is a no no.

The card I want to show today is for Stamping Dragon Design.
Funny enough, when I made this a few weeks ago, my youngest Abbie (she is nearly 4) sat down and wanted to make a card just like mine. 

I had printed of all the toppers from the set called "Emphera Journal Card Kit One" but as I was making my card, I still had left overs, so I gave Abbie the rest and she made a card like mine. Sadly I never got a picture of it before she gave it to her Auntie so Im affraid mine will have to do lol..


For this card I simply covered a card blank with black cardstock. Then my toppers out and added on top, but with little gaps inbetween them.

I then took a mask with cogs, lay it over my card and added some distress ink.
Last I added the bike (a die), the sentiment and button.

I hope you like what I have made.
Thank you for stopping by and for any comments left behind.

Saturday 21 June 2014

Southern Comfort Freebie

Good Morning :D

Today i have a FREE Sample for you, a set of  Journal Cards that match the Southern Comfort Page kit perfectly, perfect for so many of your projects just print on a good quality card/paper ink the edges after printing and you are good to go :D


Here are some samples using the Southern Comfort Page Kit, the second one shows the Journal Cards in use :D


Ok stop nattering i hear you say we want the Freebie, well you can grab it in store here

FREE SAMPLE HERE


Stamping Dragon Designs Links

Monday 16 June 2014

16th June - Scrap-page CAS Inspiration

Hello Everyone,

as part of the current CAS (Clean and Simple) theme for the month of June, I am posting my first project for The Crafting Dragon.

My post on the blog for the DT team is a digital scrap-page. I am a Paper-crafter turned Scrapbooker and I have developed a love for Digital Scrapbooking. I am currently obsessing on the SDD 'Good Friends' paper kit and I am using it a lot for my scrapbooking. The distressed look papers are great!.

As the theme suggests the challenge is to create a project with a Clean and Simple layout, keeping the embellishments  and layers to a minimum, with the space focusing the eye on the subject.
Although I am using the papers in a digital scrap-page, the layout works the same for traditional scrapbooking except where some Photoshop special effects are used.

My page is 12 x12 with the blue patterned paper as the background. I have layered strip of the Beige Damask with a punched scalloped border from the cream patterned  paper to bring the papers together. I slotted the photo between the layers at an angle to add interest and 'adhered' the photo to the page with some digital washi tape  I added a tag from the Pastel Swirls paper kit  to create a contrasting layer for the title. It was difficult to resist adding more but I am happy with the result.


Check out the  Good Friends pack at the store and see what I mean about how delicious the pack is. Also pop over to some of the sites listed below to find out more about Stamping Dragon Designs.

TTFN and thanks for the visit.

Angela

Equipment used -
Photoshop Photo Editing Suite.

SDD product used -
Good Friends


"Like" Us on Facebook
https://www.facebook.com/pages/Stamping-Dragon-Designs
Join our Facebook group for daily inspiration!
https://www.facebook.com/groups/427447597324391/
Follow us on Pinterest! 
http://www.pinterest.com/janette_padley/
Visit the Store
http://dragonslairdesigns.com/shop/
See us on CraftsUPrint
http://www.craftsuprint.com/janette-padley/
Etsy Shop- Instant downloads!

https://www.etsy.com/uk/shop/stampingdragon

Sunday 15 June 2014

15th June Inspiration by Jacqui Robinson

3

June Inspiration

Hi again guys gals and fb pals hope you're all hale and hearty and having a crafty party hehe. I'm in a rhyming mood lol.

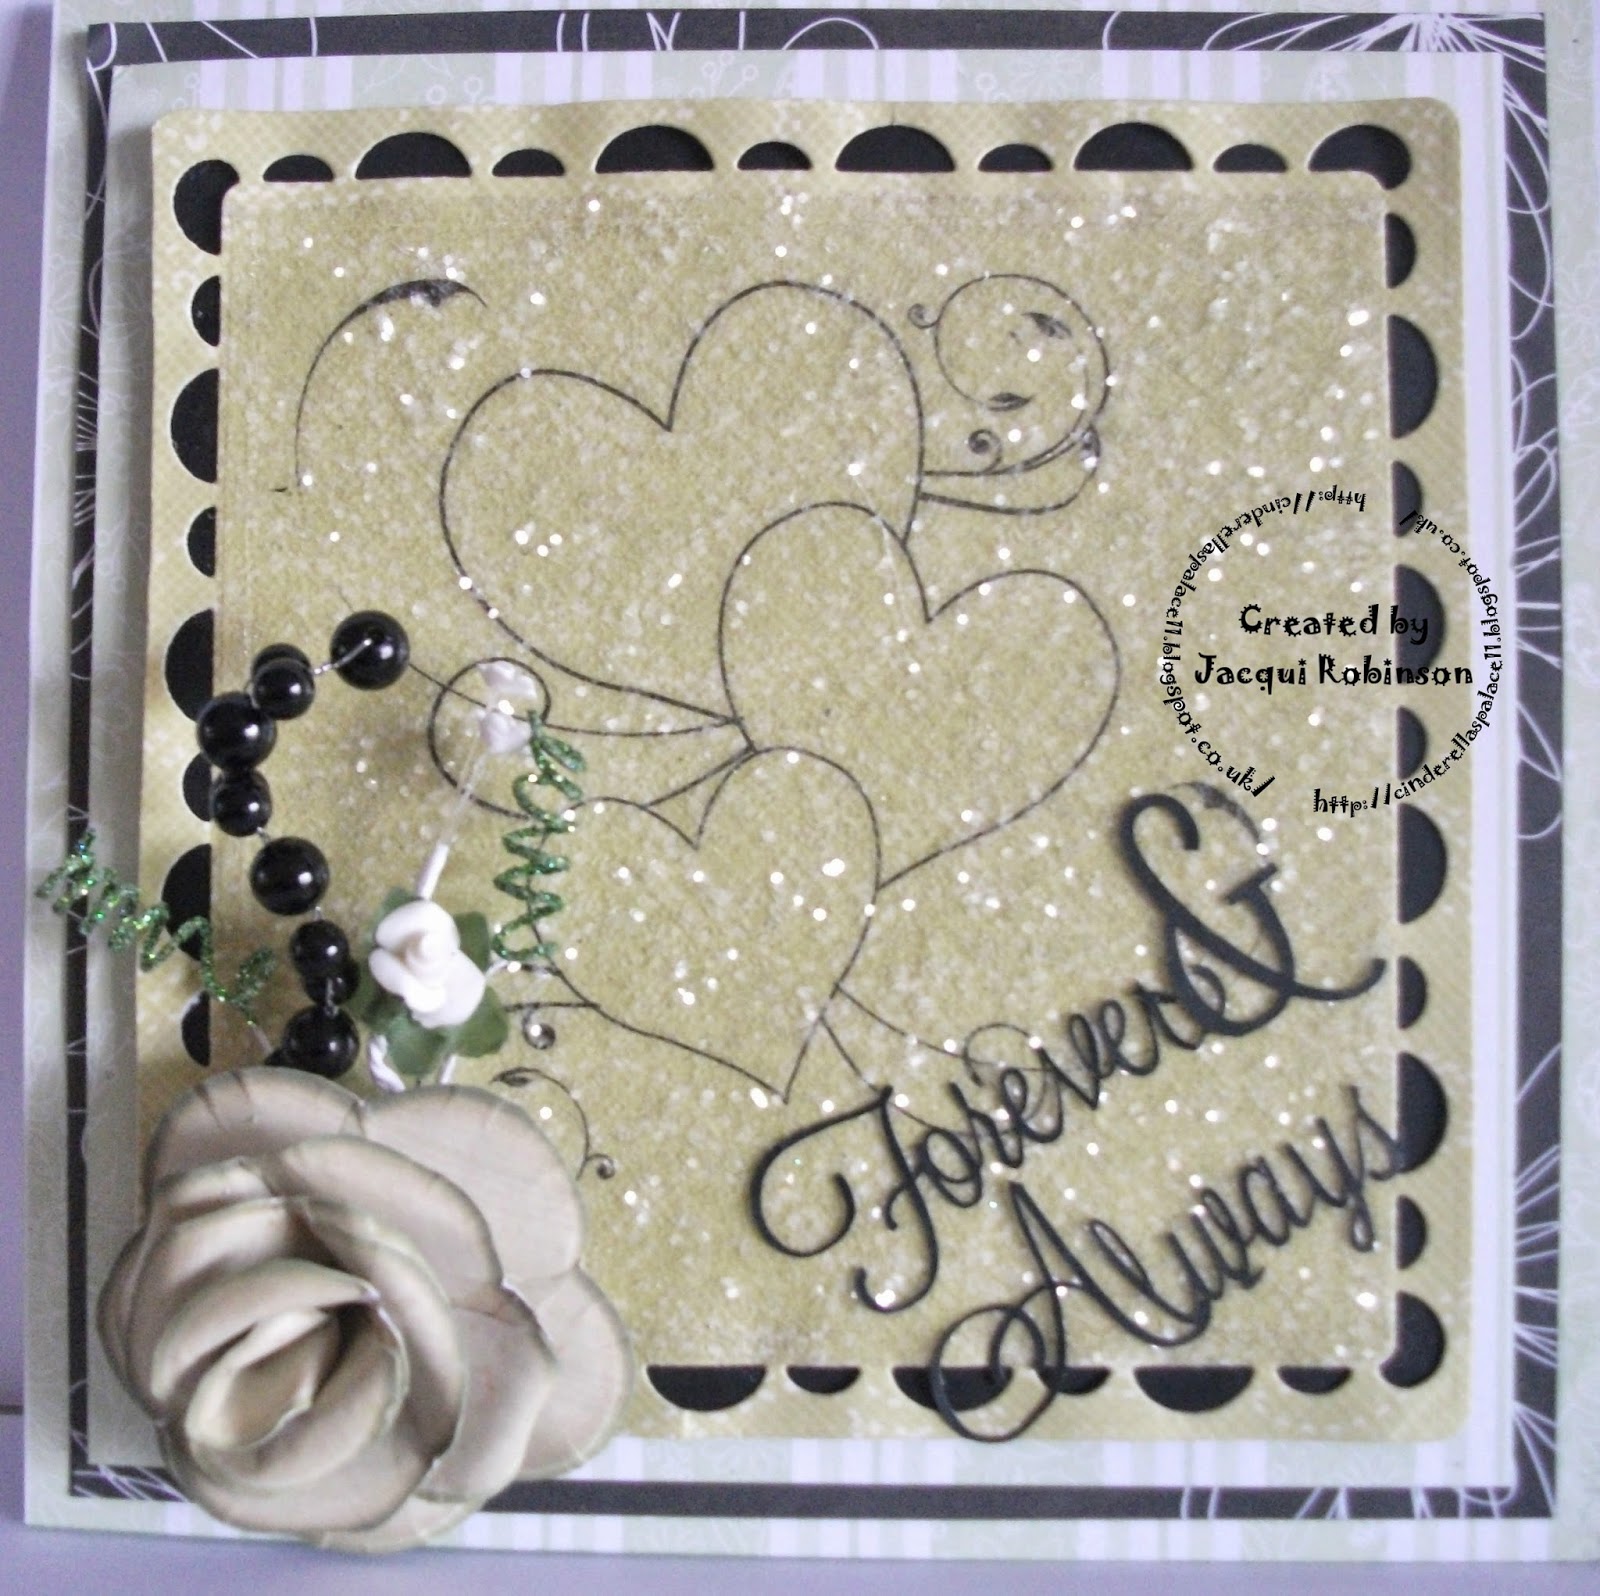
 I'm here again with some June inspiration for you.  For this piece I use the Triple Swirly Heart from the Stamping Dragon Designs to make a different modern type of card suitable for any birthday or romantic occasion. I simply printed it onto green card and covered it in iced jewels from Cosmic Shimmer to add some decadence (what a word!). I cut it out with a Tonic die.  Then I simply mat and layered with a pale green stripe card (which is hard to make out as its quite subtle) and black & white card.  I cut out the sentiment on my silhouette (which I am in the process of learning) and I made the flower with a green button design from SDDwhich I printed multiple times and layered. I added some frippery from my stash (I love that word frippery too) hehe some green glitter wire, a black gem stem and a white flower and voila it is complete. So what do you think I wonder?  Let me know please. Till next time cya l8r dragonettes


Stamping Dragon Designs Links


Tuesday 10 June 2014

CAS Inspiration


Hi everyone it's my turn as part of the Design Team for an inspiration piece and with our challenge this month being CAS I thought I would use some of the beautiful paper we have in the store and cut and decoupage some of the flowers and a lovely leaf from it. I've simply embossed some cream linen card..the card size is 7x7 added the images I cut out..simple piece of ribbon and some pearls and that's it! quick simple and CAS card. Why not pop over to the store there are some fabulous digi images and some stunning papers and lots more!!! TFL and hugglesssssssssss Sue xxxxxxxxxxxxxxx


Stamping Dragon Designs Links

"Like" Us on Facebook
https://www.facebook.com/pages/Stamping-Dragon-Designs
Join our Facebook group for daily inspiration!
https://www.facebook.com/groups/427447597324391/
Follow us on Pinterest! 
http://www.pinterest.com/janette_padley/
Visit the Store
http://dragonslairdesigns.com/shop/
See us on CraftsUPrint
http://www.craftsuprint.com/janette-padley/
Etsy Shop- Instant downloads!

https://www.etsy.com/uk/shop/stampingdragon


Monday 2 June 2014

Inspiration by Gwyneth - June

Good Morning Everybody!
Today's make is a card on the theme of sewing.  Although I've used backing papers behind the coloured in digi-stamp, a similar look could be achieved if you actually used scraps of materials to make the background squares.

Stamping Dragon Designs Item:
  • "Play Time 1" - found - Here - in the shop.
  • "Blazing Summer Mini Kit" - found - Here - in the shop.
Consumables:
300gsm, Super Smooth white cardstock;  Glue Gel; ProMarkers; Wink of Stella Brush Pens; Pieces of Lace Ribbon; White Gel Pen; Fine Line Drawing Pen

Equipment:
Scissors; Hougie Board; Ruler - one with regular holes for piercing down one side


A closer look at the card centre.


An even closer look at the coloured in digi-stamp


The image was printed at a smaller size than provided and coloured in.  I then carefully cut it out and gave it a bit of a shape with my fingers.  I took the backgrounds into one of my graphics packages and shrunk them all down into small squares and made more of each background type.  The page was then printed off.  I cut out each of the panels.  I took the ruller and put it down so that the holes were in from the edge of one of the squares.  I used the black fine pen to put a dot through each hole, before turning the card round and going round the other sides.  I then took the white gel pen and joined between every other dot like a sewing line.  I did the same for all the squares.

I took two of the linen textured cardstock and scored along one at 8".  I folded over the short side and stuck it to the other sheet of the same cardstock.  I then cut off the extra to make an 8" square card.  From the cut off piece I made a square mat to use on the front of the card.  I used the ruler as an edge to lay the squares against on the base card and then used glue gel to put each one in place, giving me wiggle time to get them evenly in place along each of the sides.  I did the same for spacing out some more squares onto the mat.  After the glue had set I used foam tape to put the decorated mat onto the card front using foam tape, trapping two bits of folded lace behind a piece of the foam on the right hand side.  I then put the cut out digi-stamp on the card front with glue gel and put three more squares tumpling off the bottom left.

-oOo-
And that is it from me for today.
Please keep coming back regularly to look at new posts as over the next few weeks you'll find various "Inspiration by ..." posts appear on this "Dragons Den" blog, as well as colouring tutorials and other posts by different Design Team members.  I'll be back with more posts over the coming months as well, so keep an eye out for those.

Stamping Dragon Designs Links
  • If you fancy trying out some of Stamping Dragon Designs, please do visit the Store to find all sorts of digital goodies (you'll find great digi-stamps and lots more).
  • And why not join the "Stamping Dragon Designs" Facebook group. It's a small, fun, group where we have lots of different activities which include exclusive challenges, daily inspiration and giveaways - and there's a loyalty club for those who take part as well.
  • "Like" Us on Facebook
  • Stamping with the Dragon - Challenge Blog : new challenge 1st Friday every month
  • Follow designer Janette Padley on Pinterest!
  • See us on CraftsUPrint
  • Etsy Shop - Instant downloads!

Till next time - Have Fun Crafting!
Gwyneth
DT Member
(And if you are wondering "who's Gwyneth?" - then you'll find an "About Me and My Blog!" piece on my blog.)

LinkWithin

Related Posts with Thumbnails