Monday, 28 April 2014

April's colour along - All about grouding

Hiya! Debbi here again, with this month’s colouring technique.

This month is all about the basics of grounding and shadows so your finished image doesn’t look like it is floating in mid-air.

So, we will start with a ground shadow. Again I will be using the light, mid-tone and dark colour technique I shown you in my last tutorial. I will be using Cool Grey 1, Cool Grey 2, Cool Grey 3 and Cool Grey 4 Promarkers.

The first decision you have to make is where your light source is coming from. I always tend to have mine coming from the right, which is what I will be doing today (we will go deeper into different light source directions in future tutorials). In the diagram below show the basics of ‘light source’ and where the darkest part of the ground shadow would be. So with his in mind, let’s get colouring!


Firstly take the Cool Grey 1 marker and lay down the colour where you would like the shadow to be.

Then add Cool Grey 2 over the top but not quite as far out as the first colour.

Now add some Cool Grey 3 nearer to the object (in this case Jiffy) 


And then add some Cool Grey 4 where the darkest area of the shadow would be (remembering the diagram above).
Now go back to the Cool Grey 1 marker and go over the whole shadow area to blend.

And that’s it! Easy wasn’t it?
Now taking that very same technique you can do grass. I have used Meadow Green, Apple, Grass (of course...lol) and Lush Green. This time though I was a little sketchier in my colouring as I wanted a bit more texture.


And to complete ad someblades of grass using the Meadow Green and Apple markers


I am sure you have all seen how outlining an image with a very light grey (se below) really makes the image pop

But recently I have been playing with just doing one side of the image so it appears to be against a wall. Here’s how I do it.
Take Ice grey 1 and add some colour along the left hand side of your image.

Now add some Ice Grey 2 over the top but not coming out quite as far as the first colour.

Then blend together and outward in to the white of the paper with a blender pen and hey presto!

I am always learning about shadows and light direction so I will keep you updated with new tips and trick I learn along the way.

 
Thanks for joining in with this month’s colour along and if you took part please add your finished image in the linky below as we would all LOVE to see it.

Until next time
Happy colouring
Debbi x

Tuesday, 22 April 2014

April Inspiration by Marleen

Hi Dragon fans..

Its my turn to share a bit of inspiration here on the 
Dragons Den..

For this months project I have used the 
Father Hood papers


To make this card I used my Circle Dies. I simply folded an A4 sheet in half and added my dies on top yet leaving the die over the fold a little bit. When I then cut my patterned papers I just cut the full circle and added on top. THat way from the front the card looks fully circular yet still folds..

And that is it from me.. I hope you like what Ive made.
Thank you for stopping by and for any comments left behind.

Friday, 18 April 2014

May Inspiration by Marleen

Hi Dragon fans

Once again my turn to share some inspiration here on 
The Dragon Den..

For this month Ive made a wedding card..
Stamping Dragon Design has an entire section for weddings with many different elements fro all kinds of crafters..

Just press HERE to go strait to the wedding Section.

 Here is what I have made for this month


I always try to have a few wedding cards lying for the summer months. There is normally always someone who needs a card last minute hence this card.
Normally i go with pink colours, but last year I got a few request for NON-pink cards hence why I went for a blue colour scheme here..

And that is all from me today. I hope you like what I have made.
Thank you for stopping by & for any comments left behind.


Tuesday, 15 April 2014

April Inspiration using Stamping Dragon Think Spring Kit

http://dragonslairdesigns.com/shop/index.php?main_page=product_info&cPath=498_523&products_id=2898

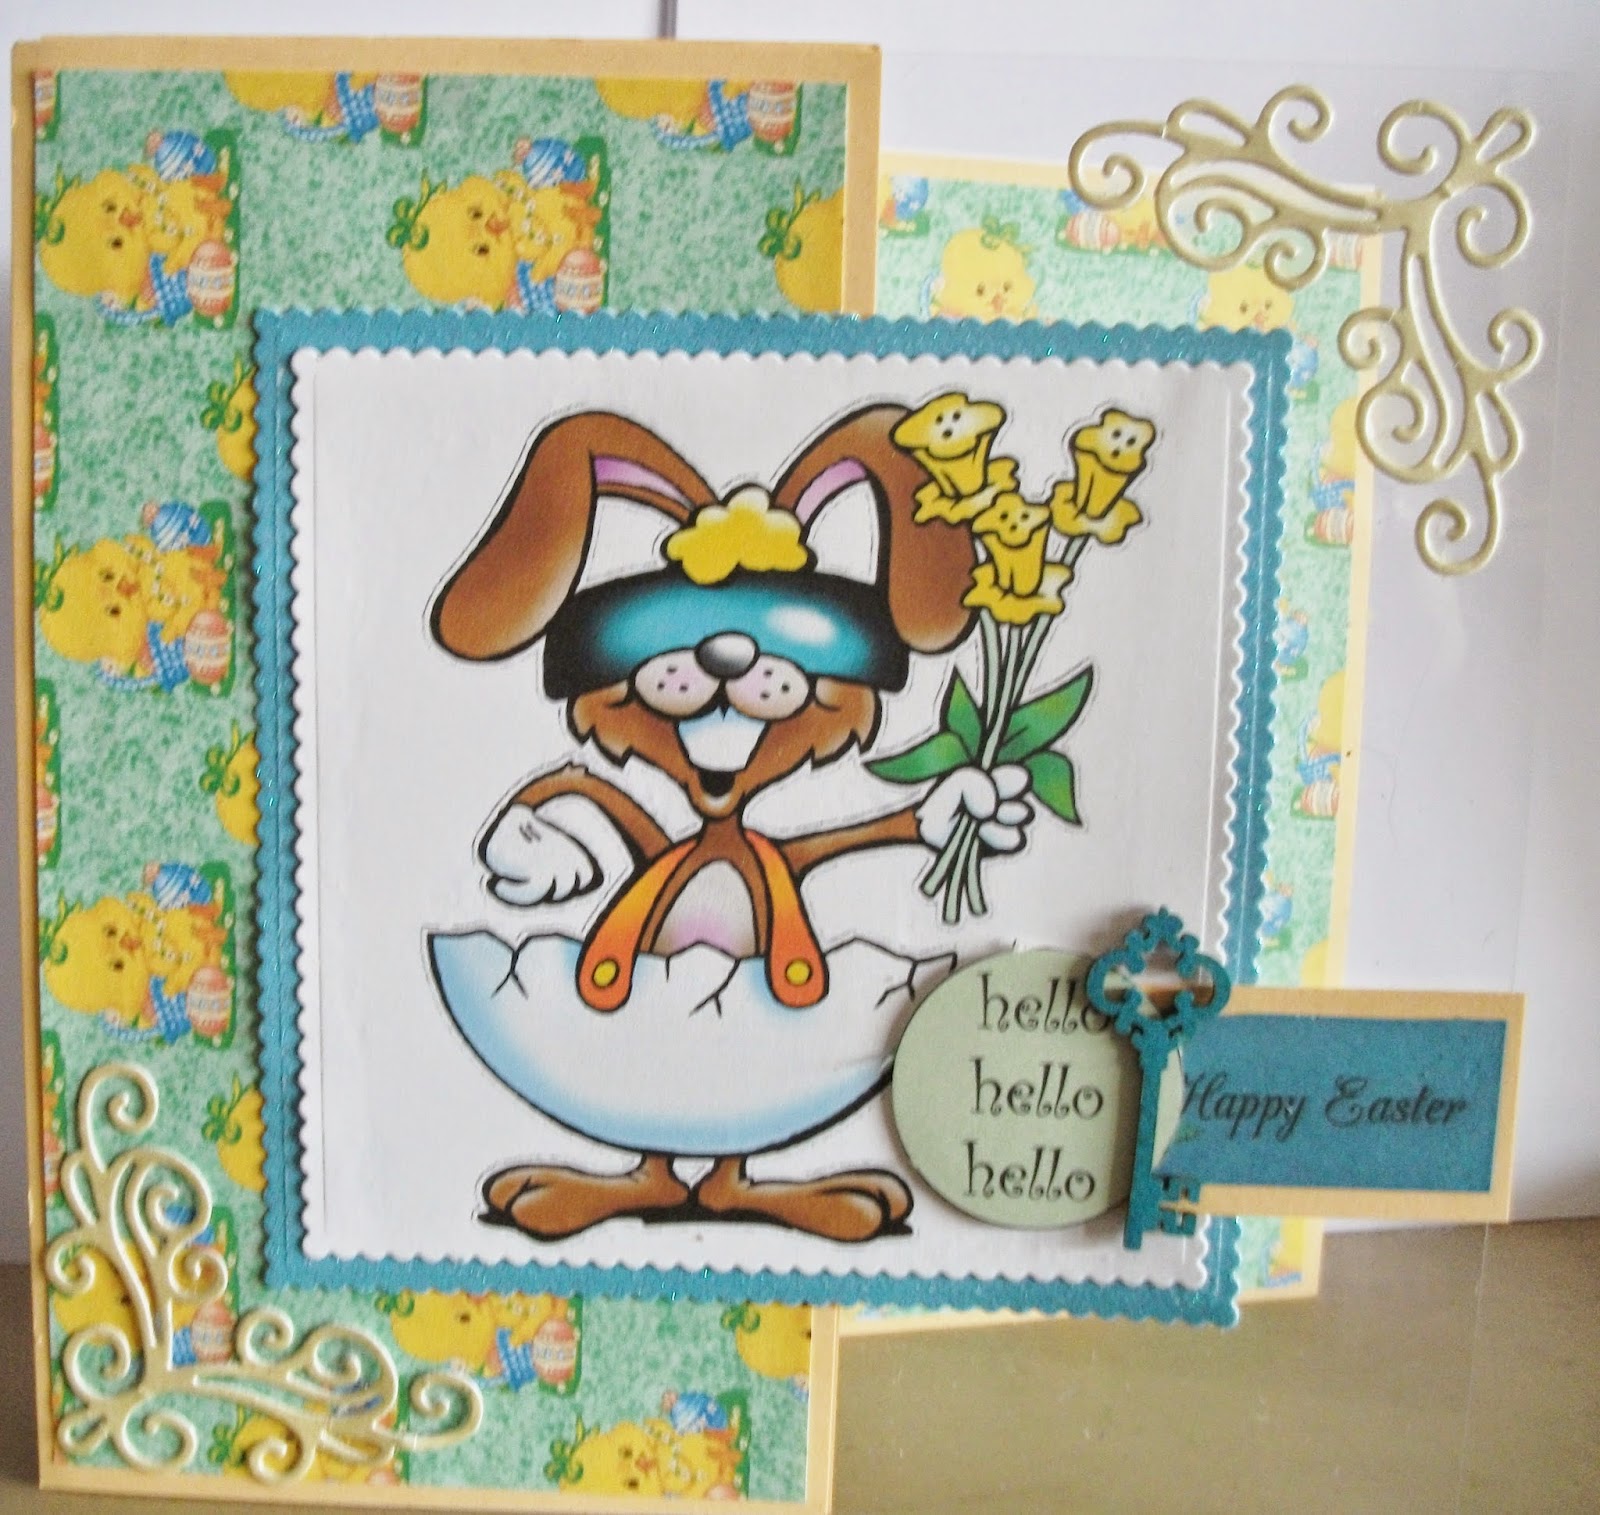
Hi all this is my April Inspiration for the Dragons Den. This kit is called Think Spring but its perfect for Easter especially for little boy Easter Cards!  And I've popped together a quick card but something a little bit different for a change. Just to spice things up lol.  I've used a 6x6 card base scored and folded the front in half then added a piece of acetate behind the top.  Although I havn't actually used the backing papers with this kit (spicing things up again lol) I have used them on other Easter cards so keep a look out. I used one A4 backing paper and matted the back and front with yellow card.  I cut my topper with the Tonic nesting scallop dies and then used the next size to add some blue as my mat. I found and Easter sentiment (the wrong colour) so I inked it blue and also a key decoration.  I added another fun hello sentiment and 2 lemon die cut corners (Tonic again).  So quick and pretty hope you like i'd love if you let me know see you soon don't forget to pop by our fb page for fun and games https://www.facebook.com/groups/427447597324391/ xx

Stamping Dragon Designs Links

"Like" Us on Facebook
https://www.facebook.com/pages/Stamping-Dragon-Designs/186321307202

Join our Facebook group for daily inspiration!
https://www.facebook.com/groups/427447597324391/

Follow us on Pinterest! 
http://www.pinterest.com/janette_padley/

Visit the Store
http://dragonslairdesigns.com/shop/

See us on CraftsUPrint
http://www.craftsuprint.com/janette-padley/

Etsy Shop- Instant downloads!

https://www.etsy.com/uk/shop/stampingdragon

Saturday, 12 April 2014

'April Inspiration'

April Inspiration Piece - Jiggy Wall Hanger

Hi everyone its my turn for the 'April Inspiration' today for the Dragon' Den. The image I have used on my wall hanger is from the fab Stamping Dragon Designs Store there are some really lovely images and papers please pop over and take a look. 

Hope you can take some inspiration from my piece today and pop over and visit the store and we also have a Stamping Dragon Facebook page, it's lots of fun and we have challenges and a great bunch of friends there. Have a great day and happy crafting!!!

Sue 
xxxxxxxxxxxx

Stamping Dragon Designs Links
https://www.etsy.com/uk/shop/stampingdragon

Monday, 7 April 2014

Inspiration by Gwyneth - April

Good Morning Everybody!
There have been some changes around Stamping Dragon land since my last post, and the regular Monday morning posts of "Pick of the Week" have gone - but of course that doesn't mean that you won't see lots of new crafting appearing here on The Dragons Den as inspiration for you - A new series of "Inspiration by ..." posts will be appearing throughout the month where the various Design Team members will have a chance to inspire you with lots of crafted creations made using downloads that are available in the Stamping Dragon Designs store, which you can find -> Here!

As this is my 1st "Inspiration by Gwyneth" post I thought I'd make a 1st Birthday card to show you today.  I've used a mini theme kit as well as a digi-stamp from the store.  I hope you like it.

Stamping Dragon Designs Item:
  • "Birthday Teddy" - found - Here - in the shop.
  • Baby Dayz Mini Theme - found -> Here - in the shop
Consumables:
300gsm, Super Smooth white cardstock; ProMarkers and FlexMarker - Satin, March Hare, Cocoa, Buttercup, Green Shoot, Frosted Jade and Dove Grey; Clear Wink of Stella brush pens;1mm deep, double sided, foam tape; 8" square Crafty Bob white card; Silver Plain Peel Off - for cutting out the greeting; Finger-lift tape
Equipment:
Brother ScanNcut; Scissors.


Slightly angled view to try and show twinkling added to hat, baloons and round embelishment elements.

Closer look at coloured in image.


The background sheet was printed out and cut with a wavy edge using my ScanNcut machine.  The digi-stamp and other elements used from the kit were taken into one of my graphics packages and re-sized and layed out on an A4 working area before I printed them out and cut.  The digi-stamp was coloured in using my ProMarkers.  I went around the outside of the card and the mat using the Frosted Jade ProMarker before building up my card in the design I wanted.  I finished off by going over the hat, baloons and circular embelishments with the clear Wink of Stella and adding the peel-offs.  "Penblwydd Hapus" is Welsh for "Happy Birthday" and "1af" is "1st".

-oOo-
And that is it from me for today.
Over the next few weeks you'll find various "Inspiration by ..." posts appear on this "Dragons Den" blog, as well as colouring tutorials and other posts by different Design Team members, so please do keep coming back regularly to have a look new posts.  I'll be back with more posts over the coming months as well, so keep an eye out for those.

Stamping Dragon Designs Links
  • If you fancy trying out some of Stamping Dragon Designs, please do visit the Store to find all sorts of digital goodies (you'll find great digi-stamps and lots more).
  • And why not join the "Stamping Dragon Designs" Facebook group. It's a small, fun, group where we have lots of different activities which include exclusive challenges, daily inspiration and giveaways - and there's a loyalty club for those who take part as well.
  • "Like" Us on Facebook
  • Stamping with the Dragon - Challenge Blog : new challenge 1st Friday every month
  • Follow designer Janette Padley on Pinterest!
  • See us on CraftsUPrint
  • Etsy Shop - Instant downloads!

Till next time - Have Fun Crafting!
Gwyneth
DT Member
(And if you are wondering "who's Gwyneth?" - then you'll find an "About Me and My Blog!" piece on my blog.)

LinkWithin

Related Posts with Thumbnails